

Easy and Festive Florals
- What: Tissue paper flowers
- When: 2 years and up
- Why: Easy, affordable, creative
- Where: At home
Got a reason to celebrate and want to add a little festivity to your life? No matter the occasion if you want an easy craft idea for kids using materials you have on hand, try making these simple tissue paper flowers. Maybe you need a little something extra to top a wrapped gift, decorate your holiday table, or say thank you. Give these tissue paper flowers a try.
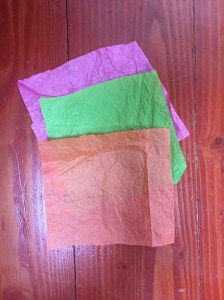
All you need is tissue paper, scissors, and tape. Leftover paper with wrinkles or tears works fine. We like to use three different colors, but you can experiment and see what works best for your intended use. Cut the tissue paper into equal size squares by layering the paper on top of each other, then trimming a square shape through all the layers. The measurements don’t have to be perfect, and you can make the square as big or small as you’d like. We used about three inch squares for our flowers.
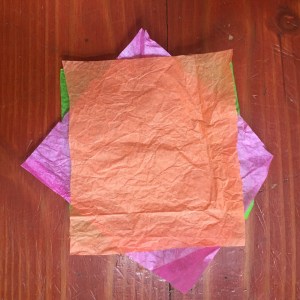
Align the paper in a stack so that the corners of each color peek out along the sides. For three layers, you can rotate the middle layer so the corners end up along the straight sides of the tissue paper on top and bottom. Poke the middle of the squares gently with one finger. Then, pick up the stack and twist the paper around your finger to create the bottom stem portion.
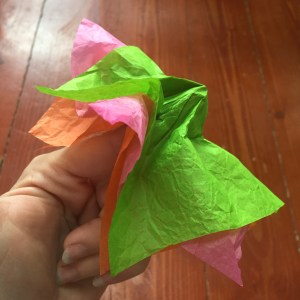
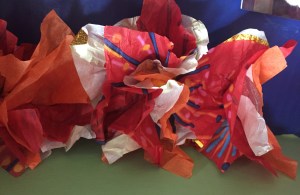
Twist as loose or tight as you’d like to get the effect you want. Then pinch the twisted paper together and remove it from your finger. You can fluff the edges, or trim the corners to make rounded petals. There’s no wrong way to do it. Tape the bottom twisted portion to whatever surface you’d like, being sure that all three layers stay secured. Or leave flowers strewn out for decoration.

Kids can manufacture these delicate flowers as soon as they can handle the tissue paper without tearing it or getting frustrated. It only takes a few minutes to turn out a beautiful blossom, so you can let kids create over and over again for almost any occasion.


Leave a comment